
Easy DIY Cleaning Supply Storage On a Budget
Easy DIY Cleaning Supply Storage On a Budget
Create a space to store all your cleaning supplies, tools, & products on a DIY budget
We are closing the door on this cleaning closet project y’all!
This is one of the rare times I have been able to complete a project in one week.
The other time was our dining room makeover & I think that about wraps that list up 😅
It really could have been done in a weekend but when you add a toddler to the mix you also add 3-4 business days so…

This little closet is located right off our family room & is pretty central to the rest of the house so I figured this was the perfect spot to hide all of our cleaning must haves!
Before this brilliant idea hit me, this closet served as a catch all closet, which was less than appealing.
Before:

The goals for this space were simple:
- Use supplies I had on hand
- Create an organized space
- Never let it look like this again
- Make it cute
Clean It Out/Find Inspo
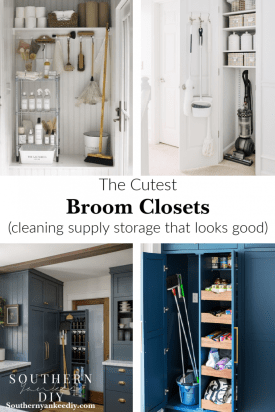
The very first step of this project was to find cute broom closets to inspire me to tackle this mess…
You can find all my favorite here
Next, I took everything out of the closet & found it a home, some items homes were other peoples homes & that’s good too!
I also removed the wire shelf because I hate those dang things.
After patching & sanding the holes I moved onto step 2.
Adding Baseboards & Paint

The flooring didn’t exactly make it all the way to the wall for some reason so I decided to just use some scrap 1x4s & create some baseboards.
I think they will help with the cuteness factor of the closet & also just make a space look “finished.”
I also decided I would paint them a fun pop of color, but I can’t giveaway that secret yet!
For the walls I am using Pure White, it’s leftover from the walk-in closet project & also one of my favorite true whites.
Adding Shelves

Next on the To Do list was to add shelving.
I ripped scrap wood about 1 1/2 inches wide for the shelf supports & used 3/4″ plywood for the actual shelves.

For the front of the shelves I ripped 6″ wide boards in half to give each shelf the appearance of thickness.
This is the easiest & cheapest way to make shelving that still looks good!
You can find the complete tutorial here
I thought it would be a nice pop of color to paint the shelves & baseboards Rosemary by Sherwin Williams!

We used this paint during Eli’s big boy room renovation & it is the perfect green, plus I had leftover paint to use so it made it doubly perfect 😉
Hanging Supplies

A spot for the broom & duster to hang was a must have for my cleaning closet.
I used scrap wood painted in Rosemary & these little hooks to create the hanging section.
If you don’t have space on your wall for a small hanging section an over the door hanger would work just as good!
Painting The Door

Slowly but surely Adam & I have been painting all the doors New Black by Sherwin Williams.
It was the cleaning closets turn for a fresh coat of paint & new hardware.
For some reason this is the only door in the house that had been painted before…
I am not sure if the previous owners planned on doing them all or not but after sanding this shiny varnish off I am so glad they stopped at one 😅
Whenever I am painting doors or cabinets I try & use my paint sprayer because it has the smoothest finish.
Storage & organizers

Obviously this was my favorite part of the renovation!
I used these black plastic baskets to store some of my cleaning products & our microfiber cloths.
Originally I ordered them for the walk-in closet but changed my mind, so they found a home here.
This sweet little basket wicker is for our cleaning sprays.
I am a huge fan of these brown reusable bottles because they look nice & also let me mix up my own cleaning concoctions.

The frame was a DIY art print project from the guest bedroom makeover in the old house!
Now it will double as art & a dry erase board so I can write down product or supplies we are out of.

This plastic bin will be the dirty rag bin so I don’t have to run to the laundry room each time.
I am so glad I made room for the vacuum & Bissell in the cleaning closet!

Now everything can be in one central location.
This project was so simple & budget friendly I can’t believe I waited this long to do it!
Now all our cleaning supplies are nicely organized in a functional space that I think still qualifies as cute.
What do y’all think?
Do you have a space for your cleaning supplies?
7

Lia, your DIY cleaning supply storage project is so inspiring! I love how you transformed a simple closet into a beautifully organized space. The idea of using scrap wood for shelves and adding a pop of color is both practical and stylish. Your tips for using baskets and hooks to keep everything in place are fantastic. This is a great example of how a little creativity and effort can make a big difference in home organization. Thanks for sharing your process and ideas!
Lia, your DIY cleaning closet makeover is truly inspiring! The transformation from a catch-all mess to an organized and stylish space is remarkable. One aspect that caught my eye is the clever use of scrap materials for shelves and baseboards—ingenious and budget-friendly. Additionally, considering adding a small chalkboard or whiteboard to jot down cleaning tasks or inventory could elevate functionality even further. Great job on this project, and thanks for sharing your creative process!
Lia, your DIY cleaning closet makeover is truly good! thanks
No instructions on the items hung on the rear of the entry door?
Hi Gerry, I just screwed some hooks onto a scrap piece of wood and screwed that piece of wood onto the wall.
Love this budget-friendly DIY idea
Amazing post thanks…..